
[重灌笔记1] -Laravel Homestead + phpMyAdmin 环境建置
从 0 到 1 建置 Laravel 开发环境并搭配 phpMyAdmin GUI 管理 MySql 资料库
最近把 Mac Reset 一遍,纪录一下重新还原 Laravel 开发环境的步骤。
环境需求
-
Vagrant :虚拟环境配置工具
-
VirtualBox :免费虚拟机软体,如果已有购买 Parallels 也可直接使 Parallels(但需要安装 plug-in )
下载、安装完这两个软体后,继续下一步设定。
VirtualBox 安装时会要求要重新开机还有要到「设定」->「安全性与隐私权」->「Allow VirtualBox」才能启用所有服务。
配置 Homestead 环境
git clone https://github.com/laravel/homestead.git ~/Homestead
cd ~/Homestead
git checkout release
bash init.sh
phpMyAdmin
phpMyAdmin 是一个以PHP为基础,以Web-Base方式架构在网站主机上的MySQL的资料库管理工具,让管理者可用Web介面管理MySQL资料库。借由此Web介面可以成为一个简易方式输入繁杂SQL语法的较佳途径,尤其要处理大量资料的汇入及汇出更为方便。 — Wiki
到 phpMyAdmin 官网下载最新版本回来。
解压缩 .zip -> 资料夹 -> 重新命名资料夹名称 -> 「phpMyAdmin」:
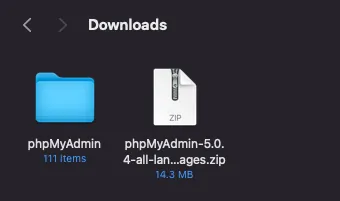
将 phpMyAdmin 资料夹移动到 ~/Homestead 资料夹中:

phpMyAdmin 设定
在 phpMyAdmin 资料夹中找到 config.sample.inc.php ,将其改名为 config.inc.php ,并使用编辑器打开,修改成以下设定:
<?php
/* vim: set expandtab sw=4 ts=4 sts=4: */
/**
 * phpMyAdmin sample configuration, you can use it as base for
 * manual configuration. For easier setup you can use setup/
 *
 * All directives are explained in documentation in the doc/ folder
 * or at <https://docs.phpmyadmin.net/>.
 *
 * @package PhpMyAdmin
 */
declare(strict_types=1);

/**
 * This is needed for cookie based authentication to encrypt password in
 * cookie. Needs to be 32 chars long.
 */
$cfg['blowfish_secret'] = ''; /* YOU MUST FILL IN THIS FOR COOKIE AUTH! */

/**
 * Servers configuration
 */
$i = 0;

/**
 * First server
 */
$i++;
/* Authentication type */
$cfg['Servers'][$i]['auth_type'] = 'config';
/* Server parameters */
$cfg['Servers'][$i]['host'] = 'localhost';
$cfg['Servers'][$i]['user'] = 'homestead';
$cfg['Servers'][$i]['password'] = 'secret';
$cfg['Servers'][$i]['compress'] = false;
$cfg['Servers'][$i]['AllowNoPassword'] = false;

/**
 * phpMyAdmin configuration storage settings.
 */

/* User used to manipulate with storage */
// $cfg['Servers'][$i]['controlhost'] = '';
// $cfg['Servers'][$i]['controlport'] = '';
// $cfg['Servers'][$i]['controluser'] = 'pma';
// $cfg['Servers'][$i]['controlpass'] = 'pmapass';

/* Storage database and tables */
// $cfg['Servers'][$i]['pmadb'] = 'phpmyadmin';
// $cfg['Servers'][$i]['bookmarktable'] = 'pma__bookmark';
// $cfg['Servers'][$i]['relation'] = 'pma__relation';
// $cfg['Servers'][$i]['table_info'] = 'pma__table_info';
// $cfg['Servers'][$i]['table_coords'] = 'pma__table_coords';
// $cfg['Servers'][$i]['pdf_pages'] = 'pma__pdf_pages';
// $cfg['Servers'][$i]['column_info'] = 'pma__column_info';
// $cfg['Servers'][$i]['history'] = 'pma__history';
// $cfg['Servers'][$i]['table_uiprefs'] = 'pma__table_uiprefs';
// $cfg['Servers'][$i]['tracking'] = 'pma__tracking';
// $cfg['Servers'][$i]['userconfig'] = 'pma__userconfig';
// $cfg['Servers'][$i]['recent'] = 'pma__recent';
// $cfg['Servers'][$i]['favorite'] = 'pma__favorite';
// $cfg['Servers'][$i]['users'] = 'pma__users';
// $cfg['Servers'][$i]['usergroups'] = 'pma__usergroups';
// $cfg['Servers'][$i]['navigationhiding'] = 'pma__navigationhiding';
// $cfg['Servers'][$i]['savedsearches'] = 'pma__savedsearches';
// $cfg['Servers'][$i]['central_columns'] = 'pma__central_columns';
// $cfg['Servers'][$i]['designer_settings'] = 'pma__designer_settings';
// $cfg['Servers'][$i]['export_templates'] = 'pma__export_templates';

/**
 * End of servers configuration
 */

/**
 * Directories for saving/loading files from server
 */
$cfg['UploadDir'] = '';
$cfg['SaveDir'] = '';

/**
 * Whether to display icons or text or both icons and text in table row
 * action segment. Value can be either of 'icons', 'text' or 'both'.
 * default = 'both'
 */
//$cfg['RowActionType'] = 'icons';

/**
 * Defines whether a user should be displayed a "show all (records)"
 * button in browse mode or not.
 * default = false
 */
//$cfg['ShowAll'] = true;

/**
 * Number of rows displayed when browsing a result set. If the result
 * set contains more rows, "Previous" and "Next".
 * Possible values: 25, 50, 100, 250, 500
 * default = 25
 */
//$cfg['MaxRows'] = 50;

/**
 * Disallow editing of binary fields
 * valid values are:
 *   false    allow editing
 *   'blob'   allow editing except for BLOB fields
 *   'noblob' disallow editing except for BLOB fields
 *   'all'    disallow editing
 * default = 'blob'
 */
//$cfg['ProtectBinary'] = false;

/**
 * Default language to use, if not browser-defined or user-defined
 * (you find all languages in the locale folder)
 * uncomment the desired line:
 * default = 'en'
 */
//$cfg['DefaultLang'] = 'en';
//$cfg['DefaultLang'] = 'de';

/**
 * How many columns should be used for table display of a database?
 * (a value larger than 1 results in some information being hidden)
 * default = 1
 */
//$cfg['PropertiesNumColumns'] = 2;

/**
 * Set to true if you want DB-based query history.If false, this utilizes
 * JS-routines to display query history (lost by window close)
 *
 * This requires configuration storage enabled, see above.
 * default = false
 */
//$cfg['QueryHistoryDB'] = true;

/**
 * When using DB-based query history, how many entries should be kept?
 * default = 25
 */
//$cfg['QueryHistoryMax'] = 100;

/**
 * Whether or not to query the user before sending the error report to
 * the phpMyAdmin team when a JavaScript error occurs
 *
 * Available options
 * ('ask' \\| 'always' \\| 'never')
 * default = 'ask'
 */
//$cfg['SendErrorReports'] = 'always';

/**
 * You can find more configuration options in the documentation
 * in the doc/ folder or at <https://docs.phpmyadmin.net/>.
 */
主要是新增修改这三项设定:
$cfg['Servers'][$i]['auth_type'] = 'config';
$cfg['Servers'][$i]['user'] = 'homestead';
homestead 预设 mysql 帐号密码
homestead/secret。
配置 Homestead 设定
用编辑器打开 ~/Homestead/Homestead.yaml 设定档。
---
ip: "192.168.10.10"
memory: 2048
cpus: 2
provider: virtualbox

authorize: ~/.ssh/id_rsa.pub

keys:
    - ~/.ssh/id_rsa

folders:
    - map: ~/Projects/Web
      to: /home/vagrant/code
    - map: ~/Homestead/phpMyAdmin
      to: /home/vagrant/phpMyAdmin

sites:
    - map: phpMyAdmin.test
      to: /home/vagrant/phpMyAdmin

databases:
    - homestead

features:
    - mysql: false
    - mariadb: false
    - postgresql: false
    - ohmyzsh: false
    - webdriver: false

#services:
#    - enabled:
#        - "postgresql@12-main"
#    - disabled:
#        - "postgresql@11-main"

# ports:
#     - send: 50000
#       to: 5000
#     - send: 7777
#       to: 777
#       protocol: udp
-
IP: 预设是192.168.10.10可改可不 -
provider:预设是virtualbox,如果用 Parallels 才需要改 folders:新增- map: ~/Homestead/phpMyAdmin to: /home/vagrant/phpMyAdmin
sites:新增- map: phpMyAdmin.test to: /home/vagrant/phpMyAdmin
如果已经有 Laravel 专案也可以一并在此新增,例如我专案都放在 ~/Projects/Web 下,所以我也先把目录映射加上去。
sites 是设定本机虚拟网域与目录映射,我们还需要修改本地 Hosts 档增网域虚拟机映射:
使用 Finder -> Go -> /etc/hosts ,找到 hosts 档案;复制到桌面(因无法直接修改)
网域名称可随意自订,反正只有自己本机可以 Access。
打开复制出来的 Hosts 档案,增加 sites 纪录:
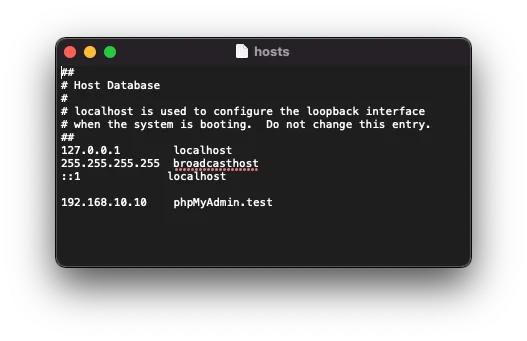
<homestead IP 位置> <网域名称>
修改好之后储存,然后再剪下贴回 /etc/hosts ,覆盖掉即可。
安装&启动 Homestead Virtual Machine
cd ~/Homestead
vagrant up --provision
⚠️请注意 ,如果没加
--provision则设定档不会更新,输入网址会出现no input file specified错误。
第一次启动,需要下载 Homestead 环境包,需要较长的时间。
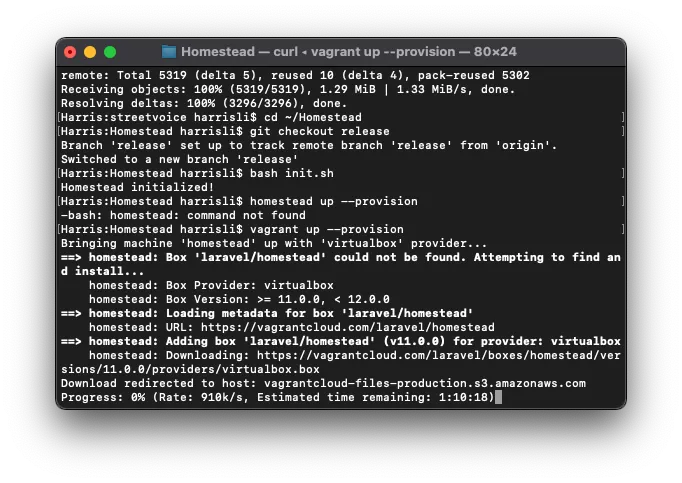
如果没有出现特别的错误即表示启动成功,可以下:
vagrant ssh
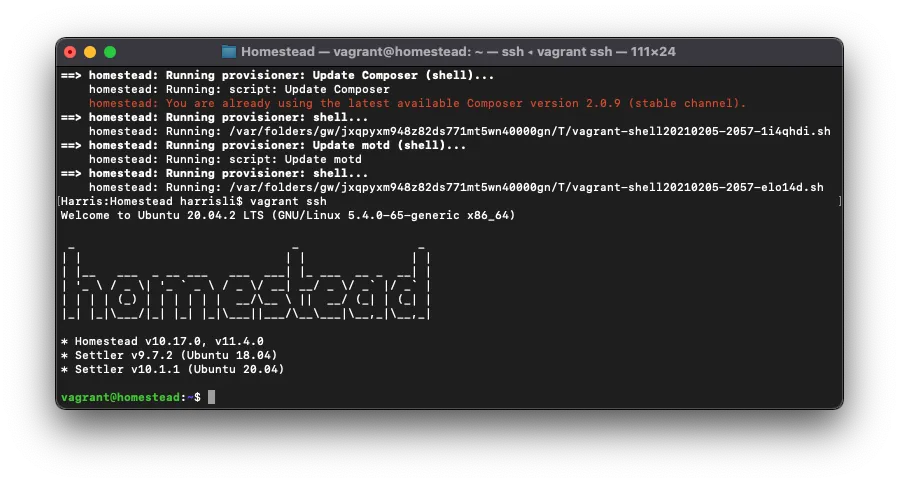
ssh 进入虚拟机。
检查 phpMyAdmin 是否正确连线
前往 http://phpmyadmin.test/ 检查是否正常开启。
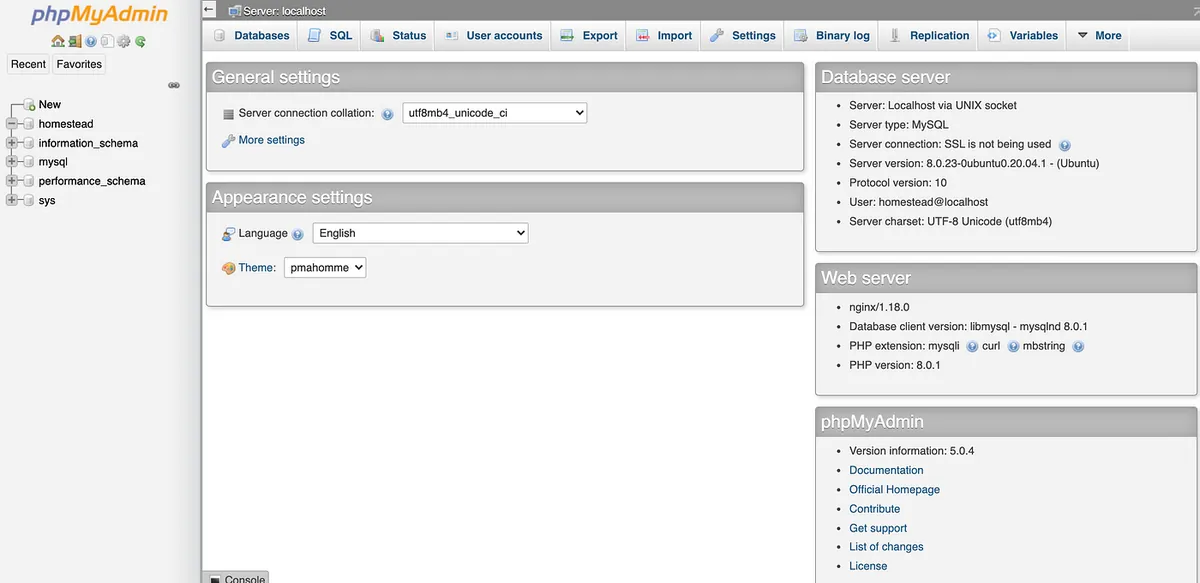
成功!我们遇到要操作资料库的地方,直接进来这边修改即可。
新建 Laravel 专案
如果你有已存在的专案,到这一步已经可以从浏览器在本地运行了,如果没有,这边补充一下新建 Laravel 专案的方式。
~/Homestead
vagrant ssh
vagrant ssh 进 VM,然后 cd 到 code 目录:
cd ./code
下 laravel new 专案名称,建立 Laravel 专案:(以 blog 为例)
laravel new blog
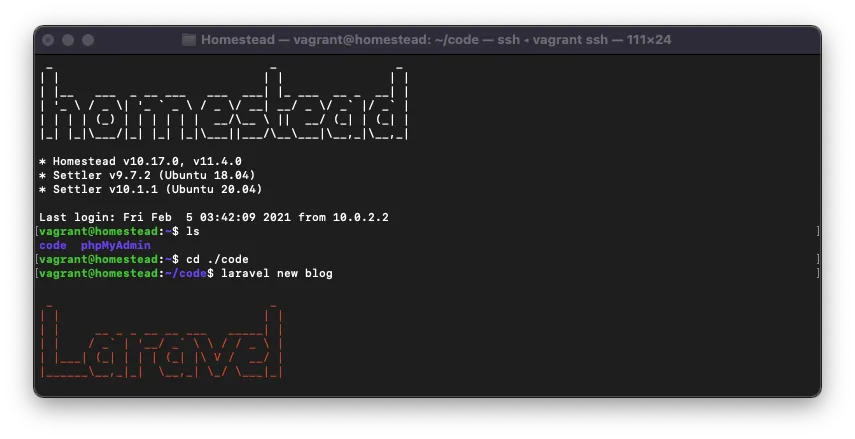
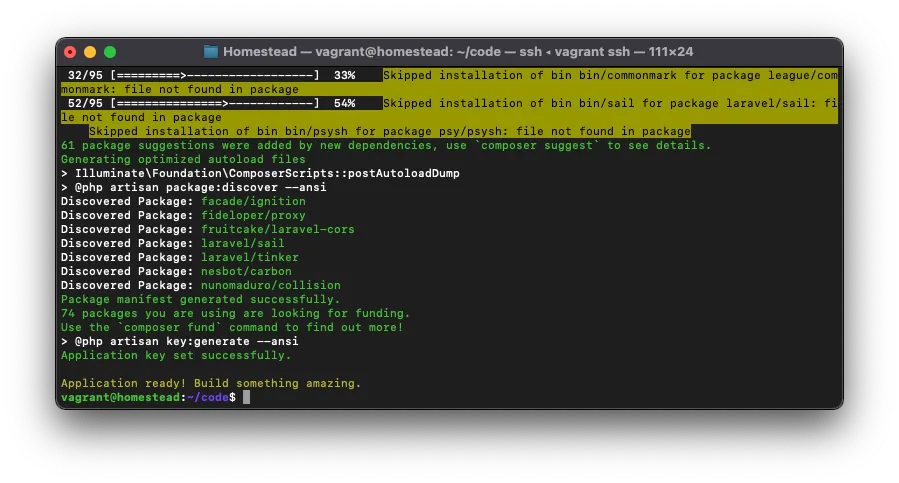
blog 专案建立成功!
再来我们要将专案设定本机器存取测试网域:
回头打开编辑 ~/Homestead/Homestead.yaml 设定档。
在 sites 中新增一笔纪录:
sites:
  - map: myblog.test
  to: /home/vagrant/code/blog/public
记得 hosts 也要加上对应纪录:
192.168.10.10. myblog.test
最后重启 homestead:
vagrant reload --provision
在浏览器输入 http://myblog.test 测试是否正确建立&运行:
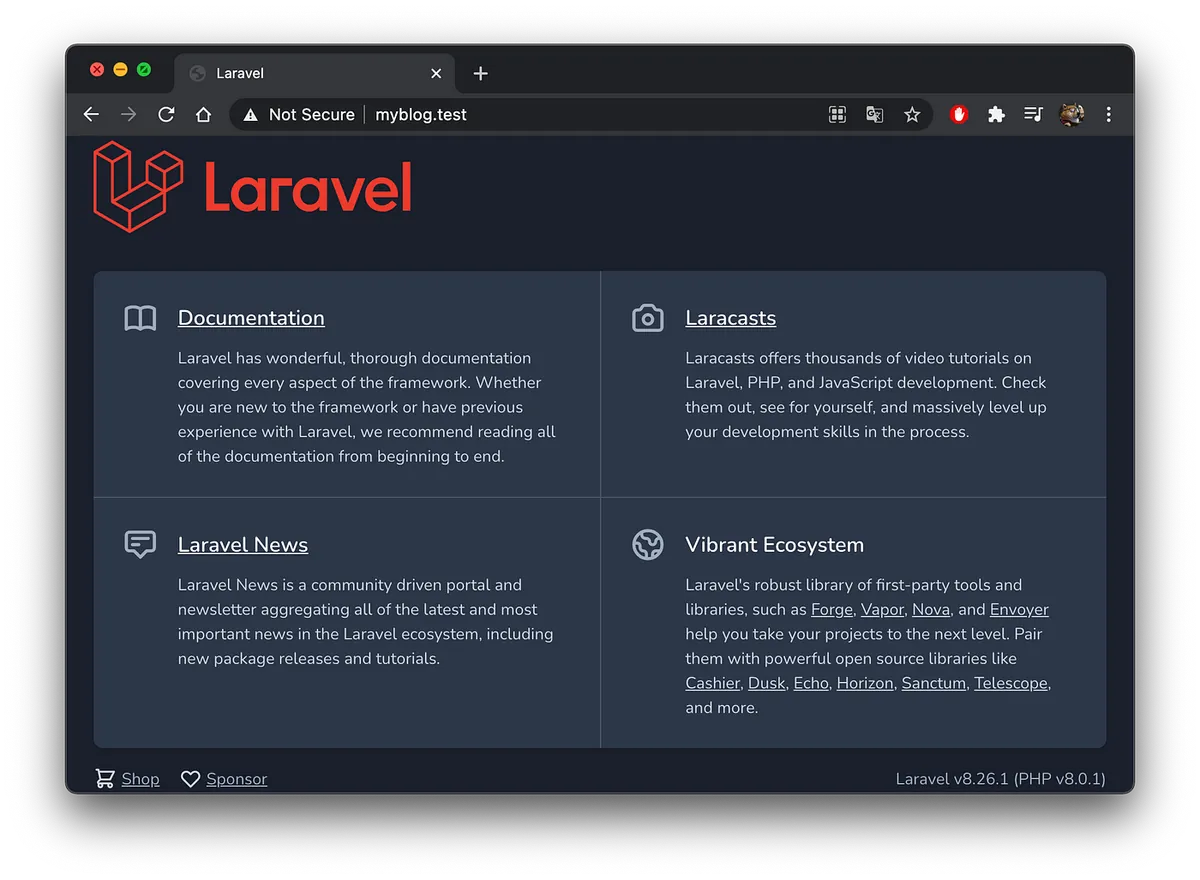
完成!
补充 — Mac 安装 Composer
虽然已经有用 Homestead 可以不需要另外装 Composer,但考虑到有的 PHP 专案并不一定使用 Laravel 所以还是要在本机上安装 Composer。

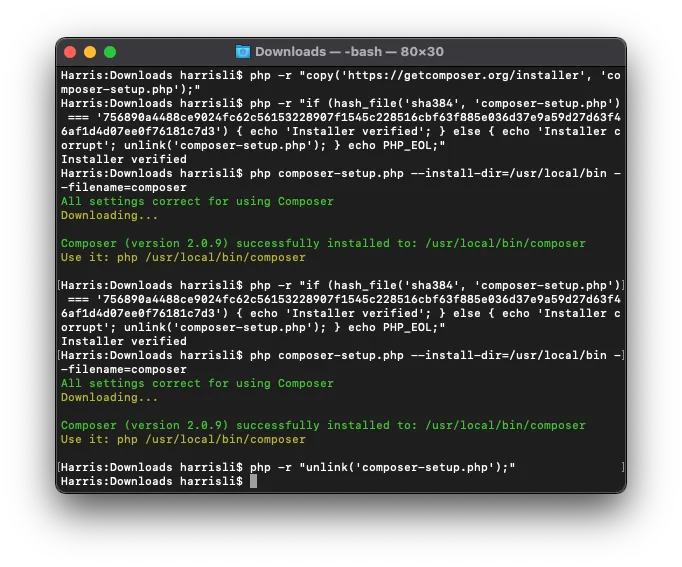
复制下载区段的指令,将 php composer-setup.php 替换为:
php composer-setup.php - install-dir=/usr/local/bin - filename=composer
Composer v2.0.9 范例:
php -r "copy('https://getcomposer.org/installer', 'composer-setup.php');"
php -r "if (hash_file('sha384', 'composer-setup.php') === '756890a4488ce9024fc62c56153228907f1545c228516cbf63f885e036d37e9a59d27d63f46af1d4d07ee0f76181c7d3') { echo 'Installer verified'; } else { echo 'Installer corrupt'; unlink('composer-setup.php'); } echo PHP_EOL;"
php composer-setup.php --install-dir=/usr/local/bin --filename=composer
php -r "unlink('composer-setup.php');"
并依序在 terminal 输入指令。
⚠️请注意 ,不要直接复制使用以上范例,因为随著 Composer 版本更新 hash check 码也会跟著变。
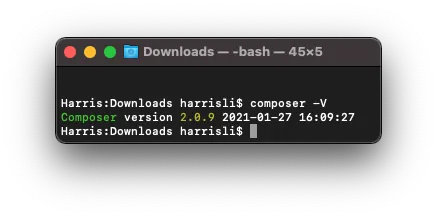
输入 composer -V 确认版本&安装成功!


留言 · Comments